


A brief history of bicycling
The dandy horse, also called Draisienne or laufmaschine, was the first human means of transport to use only two wheels in tandem and was invented by the German Baron Karl von Drais. It is regarded as the modern bicycle’s forerunner; Drais introduced it to the public in Mannheim in summer 1817 and in Paris in 1818. Its rider sat astride a wooden frame supported by two in-line wheels and pushed the vehicle along with his/her feet while steering the front wheel. The 1860s captured the realease of Velocipede or Boneshaker – a two-wheeled bicycle with pedals and cranks on the front wheel. It was known as the bone shaker because the combination of a wood frame and metal tires made for a very uncomfortable ride over cobblestone streets. See what happened next on the list:
It’s a long way from there to now. Seeing how bicycle develops through time, we know to appreciate what we are having to day and how society grows. Let spend some time to be thankful.
US’s least bike friendly city
It’s Orlando, Florida. There are mostly straight roads where cars go 45 – 60 miles/hour and no bike lanes.
Your bikes need love too!
Your bike is a mess? We can give you some easily done basic bicycle care steps that’ll rejuvenate most well-ridden two-wheelers. And the same tips can keep a new bike running and looking new for as long as you want.
Pump It Up
Probably, the number one reason bikes fall apart is because people ignore the tires. Here’s what happens: Bicycle tires have very little air in them. And bicycle tubes, which are made of butyl rubber, are porous enough to allow air to seep out. The result is tires softening over a period of about a week for road bikes and about a month for mountain bikes (though it depends some on tire size). When the tires get soft, bad things happen. Some folks decide to stop riding the bike because they think they have flat tires and they put off getting the flat fixed because it means loading the bike in the car and dragging it down to the bike shop.Lube It or Lose It
A bicycle is made up of a bunch of moving metal parts, many of which are meshing with each other. In order to keep these parts from grinding each other to dust as you pedal merrily along, they should be lubricated. Spinning parts containing bearings, such as the wheels, pedals, bottom bracket (what the crankset is mounted to), and headset (the mechanism that connects the fork to the frame and allows steering), come from the manufacturer packed with grease. About once a year, these components should be dismantled, checked and regreased. But, because special tools are needed and the work is required only occasionally, you may prefer to leave this job to a bike shop mechanic.Keep It Clean
Mountain bikers, especially those who ride in the mud, should keep a cleaning kit in the corner of the garage ready for use at ride’s end. All that’s needed is a bucket with some sponges and dishwashing detergent and a nearby hose. When you return from a ride, prop the bike up and spray off the majority of the mud and muck with the hose. It’s crucial to not blast the water sideways at the bike. Doing so may force the water into the pedals, hubs and bottom bracket, which may compromise the grease and bearings inside these components. Instead, spray water only from above and don’t ever direct it toward greased parts.Store It
I tell everyone to store bike(s) inside. It’s the best way to keep them running and looking like new. And it doesn’t take much in the way of space or supplies. The only item needed is a bike hook. These are shaped like question marks and coated with vinyl so as not to scratch the wheel when you hang the bike on the hook. Install the hook in a stud in a wall or a rafter or beam; anywhere where the bike can hang vertically is fine. I’ve seen bikes stored in stairwells, bathrooms, bedrooms—anyplace you can find dead space is fine. It’s also possible to use two hooks and hang the bike horizontally, one wheel on either hook.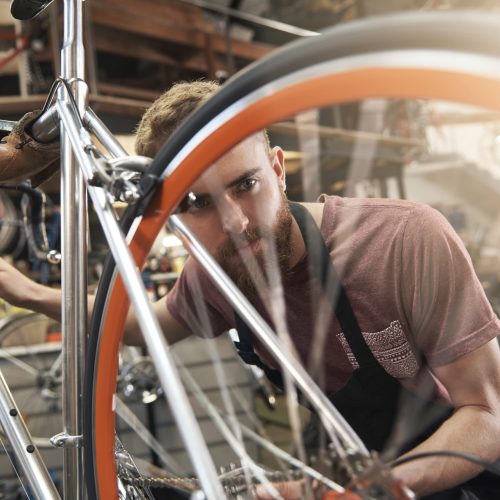
5 reasons to cycle to work
Making New Year’s resolutions to save money, get healthy, or cut your carbon footprint in 2015? You could hit all three by simply riding your bike to work. Here are 5 reasons you should consider making it a new habit this year:
Not only does biking have the potential to improve individuals’ health, wealth, and standard of living, but the combination of more cyclists and fewer cars on the road could give the entire country a much-needed boost.
It would make cycling safer for everyone.
Research shows that unlike cars, the more bicycles on the road, the safer it becomes for cyclists. “It’s a virtuous cycle,” Dr. Julie Hatfield, an injury expert from the University of New South Wales, says. “The likelihood that an individual cyclist will be struck by a motorist falls with increasing rate of bicycling in a community. And the safer cycling is perceived to be, the more people are prepared to cycle.”It is vastly cheaper than driving.
Due to rising fuel costs and tire upkeep, the cost of owning a car increased nearly 2% in 2012 to $US8,946, according to AAA. It costs just $US308 per year to keep bikes in shape — nearly 30 times less than cars, according to the Sierra Club. It says: “If American drivers were to make just one four-mile round trip each week with a bicycle instead of a car, they would save nearly 2 billion gallons of gas. At $US4 per gallon, total savings would be $US7.3 billion a year.”It’s a free gym on wheels.
On average, bicycle commuters lose 13 pounds in their first year of cycling alone. “[Bike commuting] can be a very effective cardiovascular benefit,” says Lisa Callahan, MD, of the Hospital for Special Surgery in New York City. “If you’re overweight and start an exercise program, sometimes it’s harder on your joints because you are overweight, so something like swimming or biking that’s not pounding on the joints can be a good thing.”You won’t miss morning traffic jams.
Americans spend upwards of 25 minutes per day commuting to work and more than $700 per year simply burning fumes in traffic Cycling could help you get there faster for a lot less. “Half of the working population in the U.S. commutes five miles or less to work, with bike trips of three to five miles taking less time or the same amount of time as commuting by car,” writes Kiplinger editor Amanda Lilly.You don’t even have to own a bike.
There’s been a wave of new bike share programs in major cities like Washington, D.C., Boston, Chicago, and Miami, which typically allow riders 30 to 45 minutes of transportation for a small annual fee. When New York City’s bike share launched in May, annual memberships cost $US95 — about $US10 less than subway commuters spend per month.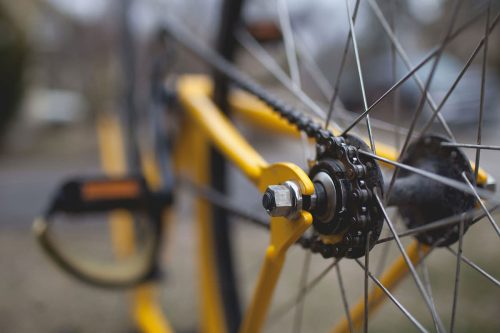
Choosing your equipments
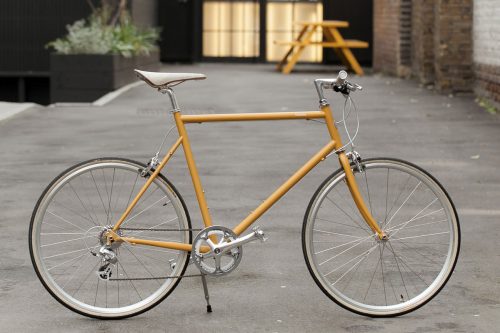
Be a smart and well – equipped cycler. Before you purchase a bicycle, think about the type of cycling you plan to do. Pick and choose from the myriad of options to find the combination of features that best suits you and your goals.
You might be tempted to buy everything available for your bicycle. In the beginning, you may not need a bicycle computer, GPS, and heavy winter gear. As your experience and skill level improve, you can add items to your gear collection.
The Bicycle
If you plan on a combination of road and mountain biking, pick a hybrid. Road bikes are for the road and mountain bikes are for off-road use. The most important part of bicycle shopping is finding the right frame size. A frame that is too small will place unnecessary strain on your joints. A frame that is too large will decrease the level of control you have over your bike. If the frame is not properly fitted to your body, your center of gravity will be greatly compromised. When choosing your bicycle, pick the best combination of features for the type of cycling you plan to do. For example, don`t put off-road tires on a road bike.The Shoes
Many road bikes along with mountain bikes include clipless pedals to which special shoes attach, via a cleat, permitting the rider to pull on the pedals as well as push. The right cycling shoes will support your foot on the pedal. This can reduce cramping and foot fatigue as you ride. The shoe you pick will depend on the type of pedal you plan to use with your bicycle.The Helmet
Helmets offer essential protection while cycling. Modern designs are sleek and lightweight. There is no longer a question of style when choosing to wear a helmet. Helmets are proven to save lives and prevent life altering injuries from having their full effect. A good helmet will cost you at least US$50 and the best helmets can cost hundreds of dollars.The Clothes
Dress for the weather. Lightweight, breathable fabrics are excellent for keeping the body cool and dry in warm weather. Moisture-wicking, heat retaining fabrics like fleece are best for winter riding. Gloves, glasses, socks, and extra outer layers are important regardless of season. In general, fabrics suited for most outdoor sports will be appropriate for cycling. However, avoid loose fitting clothing as these clothes may get caught in your spokes, chain, or handlebars.
Basic riding techniques (part 2)
As promised, we are back with another set of basic techniques for you. Thank you for waiting. We hope that these tricks and tips will help you have a great experience with your new hobby. Good Luck and Have Fun!
How to Shift
If you think of yourself as the bike’s engine and try to shift frequently to maintain a comfortable and steady pedaling effort, you’ll begin to use the gears more effectively. Keep in mind that shifting works best when you apply only light pedal pressure to the pedals. So shift before the hill gets too steep and never stomp the pedals until a shift has taken place. Most people find a pedal cadence (how many times one pedal goes around in a minute) of about 60 to 90 rpm about right. Find what feels good for you and then shift every time it’s either too hard or too easy to pedal. When you realize that you need to shift, use the right shift lever for small adjustments in pedal effort and use the left lever for major changes in how hard or easy it is to pedal. Most important: don’t be afraid to shift. Shift often and you’ll get good at it and on rides you’ll save energy and feel better.Corner Fearlessly
When you come into a scary turn, if you can get yourself to look to the inside of the turn (don’t just turn your eyes, turn your head and shoulders) you’ll find that the corner is not so scary anymore and you’ll scoot right around it.Take Juli’s Advice
Mountain bike champ Juli Furtado once said, “The faster you go, the easier it gets.” It’s great advice. Most of the bike handling problems people have are related to riding the brakes too much. If you can back off the brakes and let the bike roll, you’ll discover the wonders of momentum: with a little more speed, the bike gains stability, it gets easier to hold the good line and you steamroll obstacles that used to give you fits.Use Bigger Gears Off Road
To make off-road rides smoother and more comfortable, try riding in slightly larger gears. This allows you to support more of your weight on the pedals and get some off your seat, which allows “floating” over, rather than pounding into ruts, roots and other rough stuff. The same trick works riding your road bike over bumpy pavement. Give it a try!Just Learning?
New cyclists are often afraid to ride on busy streets because they’re not confident getting into the pedals, shifting and braking. You could pedal laps around the neighborhood. A more exciting approach is putting your bike in the car (bring along a cooler with some goodies) and driving to a safe country road. Here you can ride in either/both direction(s) from your car to see some scenery while practicing your skills on a safe road!
How to babysit the bike
After the article “Take care of your bikes. They need love too!”, we received a lot of positive feedback from you, our beloved readers and requests for more. Therefore, without further ado, this is how you can thoroughly maintain your bikes.
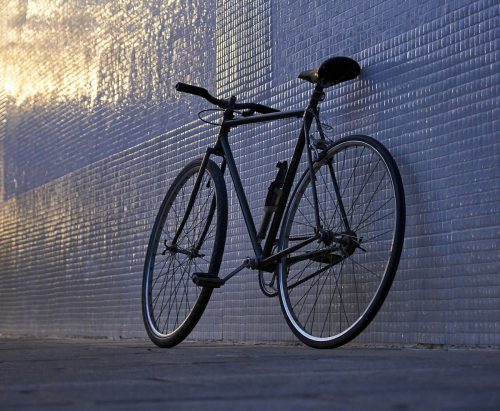
Store It
I tell everyone to store bike(s) inside. It’s the best way to keep them running and looking like new. And it doesn’t take much in the way of space or supplies. The only item needed is a bike hook. These are shaped like question marks and coated with vinyl so as not to scratch the wheel when you hang the bike on the hook. Install the hook in a stud in a wall or a rafter or beam; anywhere where the bike can hang vertically is fine. I’ve seen bikes stored in stairwells, bathrooms, bedrooms—anyplace you can find dead space is fine. It’s also possible to use two hooks and hang the bike horizontally, one wheel on either hook. It’s not the hanging that saves the bike. It’s keeping the bike out of the environment. You might think it’s okay to leave it on a porch or deck as long as there’s a roof covering it. Don’t make that mistake. Moisture in the air will attack the metal parts on the bike. Especially caustic are areas close to the ocean where the salt in the air will quickly corrode components. You can avoid these hazards by simply storing the bike indoors. If you don’t like the idea of bike hooks in your walls or rafters, consider a bike storage display stand, which your local bicycle shop might stock or can order for you. These provide convenient storage while displaying the bike like a work of art.Baby It
Bikes are tough but you greatly increase the chance of problems and rapid wear if you beat them. It’s much better and you’ll enjoy the riding more, if you learn how to ride smart to protect the bike. The key skill is to learn to constantly scan the road or trail ahead and try to avoid the things that ruin a bike such as potholes, ruts, roots, rocks, glass, oil spots, etc. Some of these things can’t be avoided. And riding off road, you have to ride over obstacles all the time. But there are ways to do it, and still save the bike. Learn to get up off the seat and bend your arms and legs the same way a jockey sits on a racehorse. If you do this every time you spot objects you can’t ride around, you’ll protect the frame, fork, wheels and components. If you enjoy jumping a mountain bike, learn to do so professionally. Good jumpers rarely land hard. They work on their technique so they land softly; you barely hear the impact. Ditto for riding wheelies or hopping over logs and things. The lighter your technique the better chance your bike won’t take a beating. It’ll save you money in replacement parts, greatly reduce the chance of injury, and ensure that your bike keeps running trouble free.Inspect It
All machines wear, and a bike is no different. Expect changes in your equipment if you ride a lot and prevent failures by staying on top of things with weekly or monthly inspections (depending on how much you ride). Scrutinize the brake pads to see if they’ve worn out (most have grooves in them; when the grooves disappear, replace the pads). When the pads shrink from use, you not only lose braking power, the chances of the pad diving into the spokes or striking the tire and popping it increase. Operate the brake and shift lever and look closely at all four cables both at the levers and at the derailleurs and brakes. Also inspect along the frame. If you spot any signs of fraying or rusting or even if you see cracking in the cable housing sections, have the cable and housing replaced by a shop. That’s much better than getting stranded miles from home with no brakes or a bike stuck in a super-hard-to-pedal gear. Check the tightness of key component by putting a wrench on every important bolt and snuggling slightly to see if it has loosened. Check the seat and seatpost bolts; the wheel quick releases; the stem and handlebar bolts; the brake and shift lever bolts; wiggle the spokes to feel for loose ones; tighten clipless pedal screws; and don’t forget bolts holding on accessories, which can loosen too.Bikes designer cycling tour
Designers touring is not only a fun activity for company staff bonding but also a good way for them to know about the product better and as the result, design more user friendly products.
Basic riding techniques (part 1)
Whether you are racing in competitions or just riding around with friends, this can be an extremely fulfilling hobby which is easy to get started in. Cycling offers entertainment, exercise, and an excellent way to just get around town.